| iWall |
Function |
iWall is a Mac that can use any of the beautiful video (no conversion), picture, animation, flash, gif, swf, 2D, 3D, program, web, app, website as your dynamic wallpaper, dynamic desktop.
|
 |
|
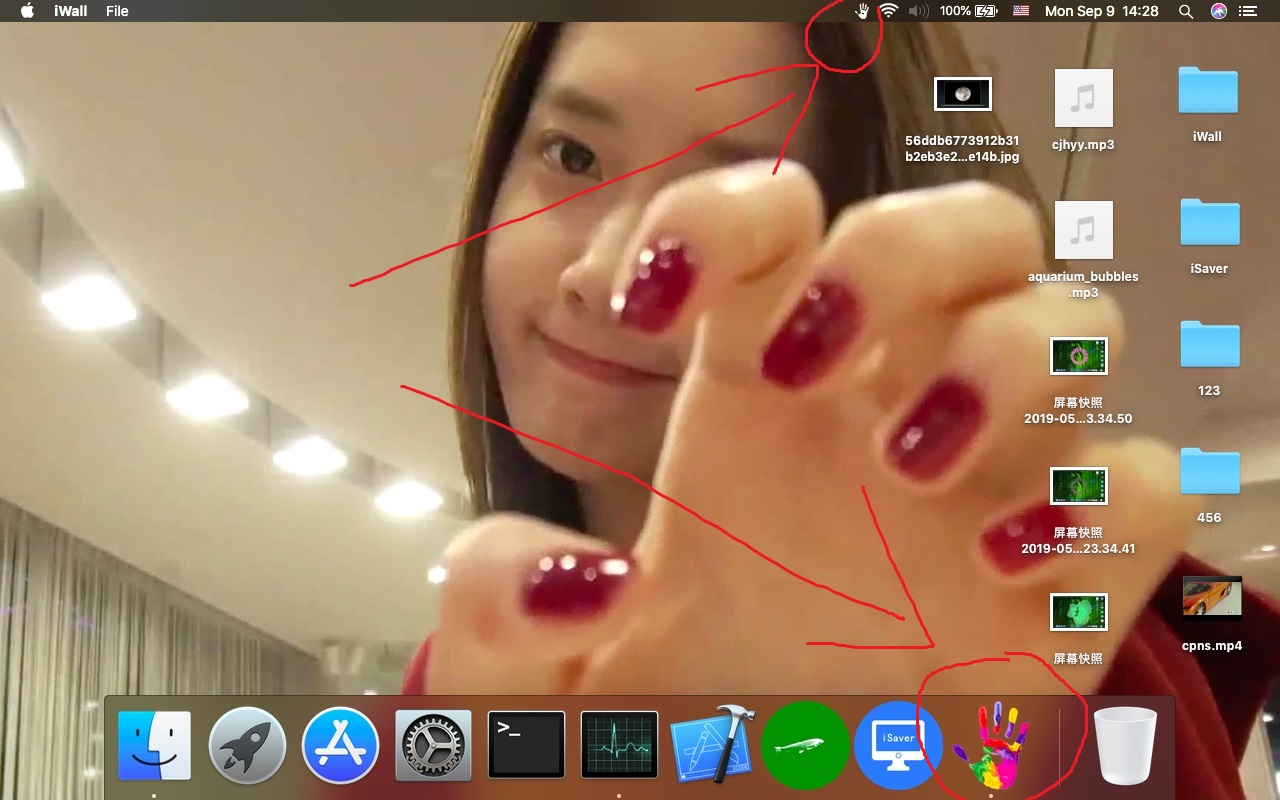
iWall novice help and audio visual installation tutorialUse video£ºThis is the complete use of the video, you will understandIn addition to the iWall preferences, you can also directly place the mouse on the video, image, gif, audio, web page file and right click to select iWall to quickly open the settings to the desktop and switch the desktop source. If set to the default iWall, just double click It's super easy and convenient. For the first use of web resources, please set the storage directory (see the red circle and the arrow pointing to the screenshot). For example, it is stored in the Downloads directory. The function of opening the web button is prompted. In the top menu bar iWall small icon drop-down list, click the Select web file directory option, click Open to select a storage directory such as Downloads or other, and then click Open. After setting up the web resource, just open the iWall preferences and click the Open Web Page button to select the index.html in the resource. You can also right click on the index.html and select iWall to instantly set it to desktop and switch resources. If it is set to the default iWall, just double-click it, it is super simple and convenient. Some web resources can interact, and interaction can be played. For example, playing games, particle effects follow mouse movements, using urls, etc. If you need to interact, just click on the hidden desktop icon. You don't need to interact, just click on the desktop icon. If there is a problem when playing video, as long as it is playing video, no matter what the problem is, it is the problem of the video itself. This is just to change the format of the problematic video source, that is, the extension of mp4 to avi. Name, and in the pop-up dialog box, choose to use avi as the extension, and then open it with iWall, any video problem can be solved as long as this. Use video£ºWeb resources use detailed action video for the first timeAudio Visual Installation Tutorial£ºUse video£ºAudio visualization using detailed action video
Audio visualization is as simple as installing a virtual sound card, and any virtual sound card can be used (if there is a virtual sound card, there is no need to install it). If you don't have a virtual sound card, just use the one provided by me. Just download and install the virtual sound card as prompted, and there are detailed installation and use tutorials. Once installed, you can start using the audio visualization function. Just open the audio visualization wallpaper source with this function. After you open it, you can enjoy the audio function by playing music. You can display the internal sound and microphone collection of the device. the sound of. At the same time, you can record the sound collected inside the device and the microphone, and you can record your audio and video simultaneously while you are recording. The built-in microphone can be used by default. If there is no microphone or you need to use the audio visualization function better, just click the installation driver to install the virtual sound card, there are detailed installation and use methods. Download the virtual sound card, remember that any virtual sound card can be installed and used. If you have it installed, you don't need to install it. If you don't install it, you can download it here:https://www.apowersoft.com/faq/install-mac-audio-device.html?tdsourcetag=s_pcqq_aiomsg Once installed, iWallAggregate will be checked by default here. Here the default display ap This can be displayed in the audio device. If not created manually, open the Starter -> Other -> Audio MIDI settings, click +, select "Create multiple output devices", select the newly created "Multiple Output Devices", in In the list on the right, check "Apowersoft_AudioDevice" and the audio output device of the computer, then click "Multi-output device" again, rename "Multi-output device" to "iWallAggregate", then turn off the audio MIDI settings and re-open iWall preferences. Settings, check the audio visualization. At this point, you can use the dynamic desktop source of audio visualization. When you use it, remember to click the drop-down list on the top menu bar speaker icon. Check if iW has sound and waveform. If you need to adjust the volume, just check the built-in speaker or other audio equipment. Adjust the volume, check ap can only display the waveform without sound (drag the volume bar to change the size of the waveform). Check the ap can only display the waveform. When you find that there is no waveform, check the ap and turn the volume bar to the minimum. At this time, just adjust it to the maximum, then check the iW. Simply come here, enjoy it! Enjoy this new audiovisual feast. iWall uses a little knowledge, if you check the boot, it is only started when booting, but there will be a prompt. If you need to follow the system to start, you don't need this prompt. Just right click on the iWall icon in the Dock bar, select the option, and check the login to open it to follow the system startup, which is second. If the Dock bar icon is hidden, it can be displayed after setting it. The preference setting is checked to display the Dock bar icon. Both the Dock bar icon and the top menu bar icon can be hidden. If they are hidden, you can use the shortcut keys or enter the system preferences to find the iWall icon to open iWall preferences or switch other functions. iWall's perfect use, iWall preference check tick boot - Dock bar right click iWall big icon, option, tick when login to open -iWall preferences tick lock screen effects - Dock bar icon and top menu bar icon hide - use shortcut The key is really easy to use. From then on, you will fall in love with iWall. It is easy to come here. I hope it will bring you happiness every day, let you learn a lot of things, and help you to use the equipment better, thank you! Any needs can be contacted at any time, including custom resources, I wish you happiness.
Use video£ºThis is the complete use of the video, you will understandiSaver is very simple to use. The point is that you can install iSaver in the first time and every time you update it. After installation, you can play it at will. The details can be seen at a glance. The built-in interesting and useful resources are both clickable and previewable. The local resources only provide previews for videos. The webpages do not provide previews. Any type of resources can be switched by pop-up preferences by clicking the preview option on the app's interface. And the function switch, the video clicks to open the video file button, the webpage clicks the open webpage file button to select the corresponding type file, and the webpage resource is remembered and stored in the downloads directory. After setting the resource type, you only need to turn off the APP. You don't need to worry about it. You will enter it when you set the time. If you set the trigger angle, you can quickly enter the screen saver. If you need to mute and set the resolution preference interface, there is an option, just check the corresponding one.
If iWall is used, iSave can be controlled during the process of using iWall. The top menu bar can be clicked to open the screen saver for function switching and screen saver resource replacement. If the shortcut key is used, just press option+i to open it. The resources of both iWall and iSave are common. Video, webpage, GIF, image, and website can be set as screen saver. Various effects and gameplay can be realized. Simply come here, there is a need to contact anytime, including custom screensaver resources, I wish you happiness. |


